You can watch a short video explaining the event module and how to manage it
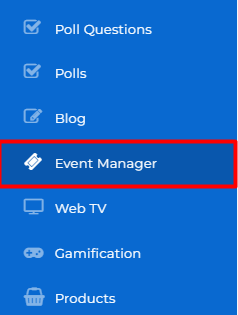
Login to your admin account and click "Event Manager" from the left side menu under "Other"
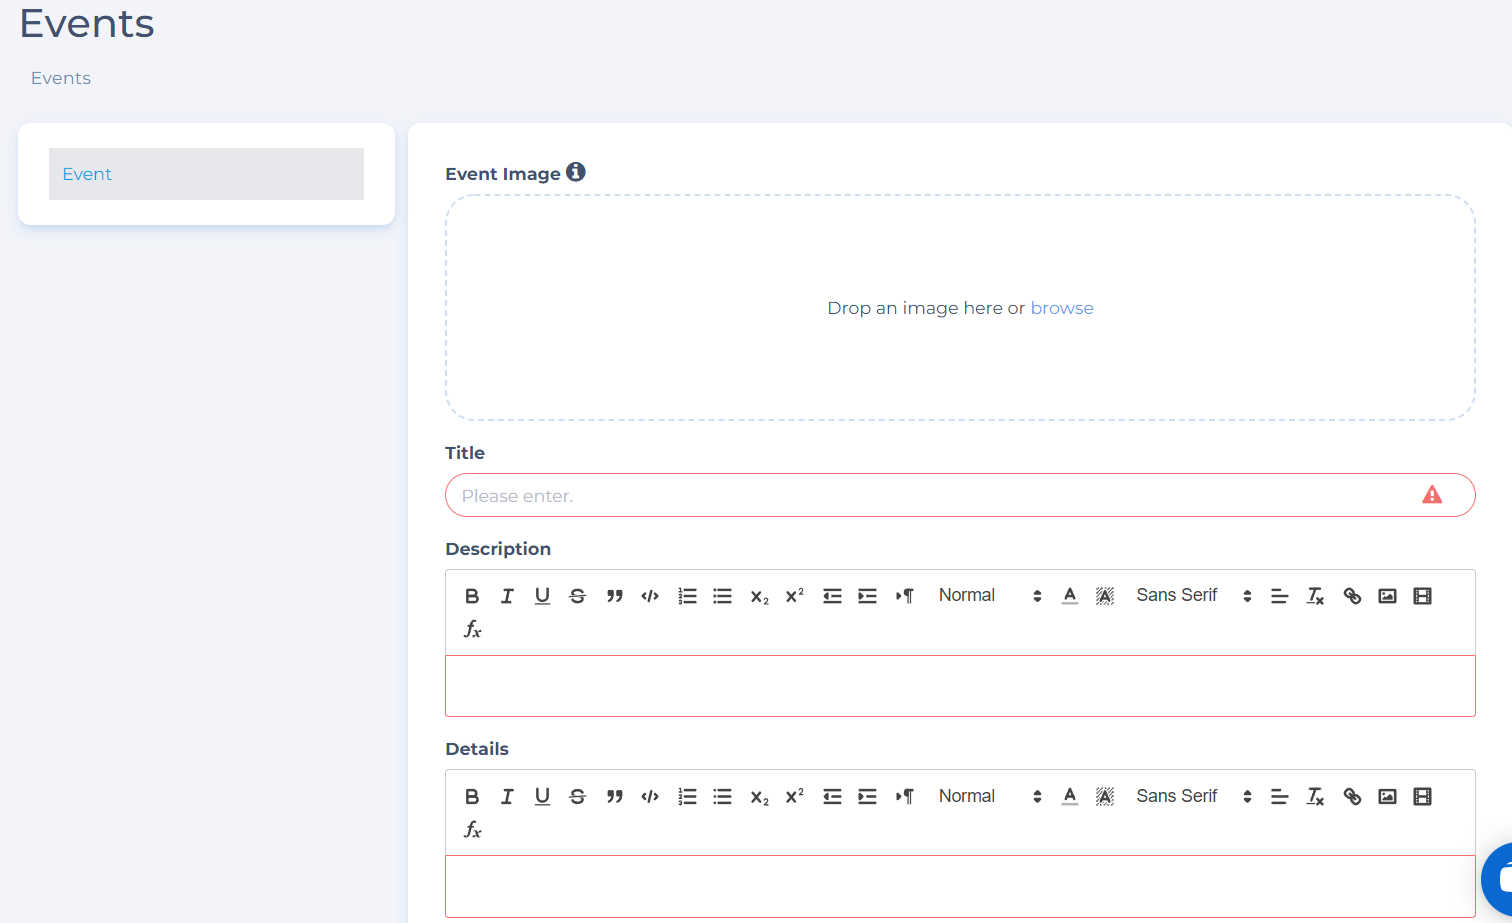
To create an event, click the "Create Event" button on the right side of the page.

add; Event image, event title, event description, event details;
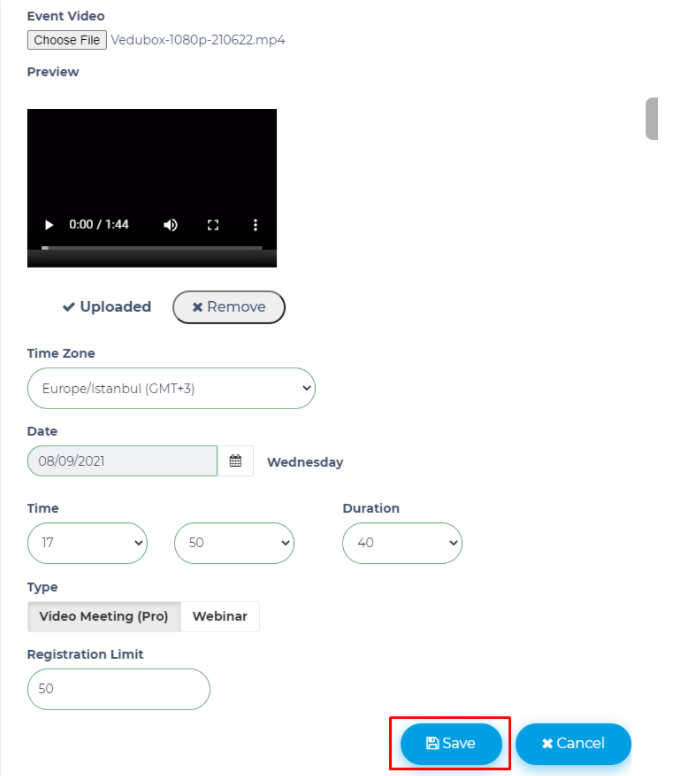
You can set the event promotional video, event date, event type (video meeting - webinar), and participation limit.
 Paid: When you select the "paid" option, you can organize paid events. The system integrates with Stripe and PayPal, allowing participants to register by making payments. The collected fees are transferred directly to your account.
You can create your event by clicking the Save button.
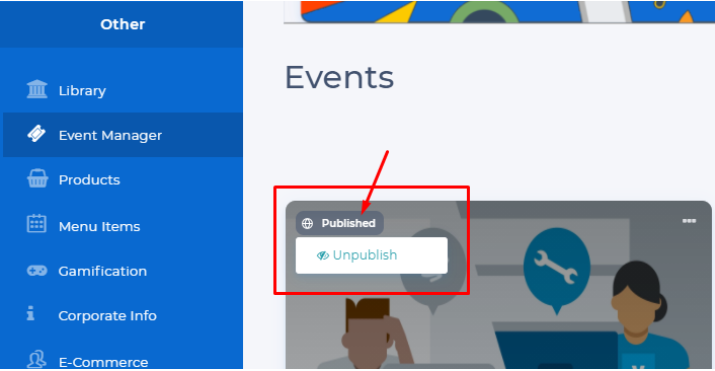
You can view the events you have created from the event manager module, and you can unpublish them by clicking on the published area then click "Unpublish" as shown below. So your event is not displayed on the event page.
You can update the event by clicking the 3 dots.
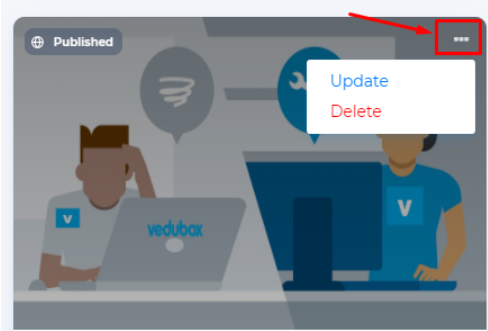
In the update area;
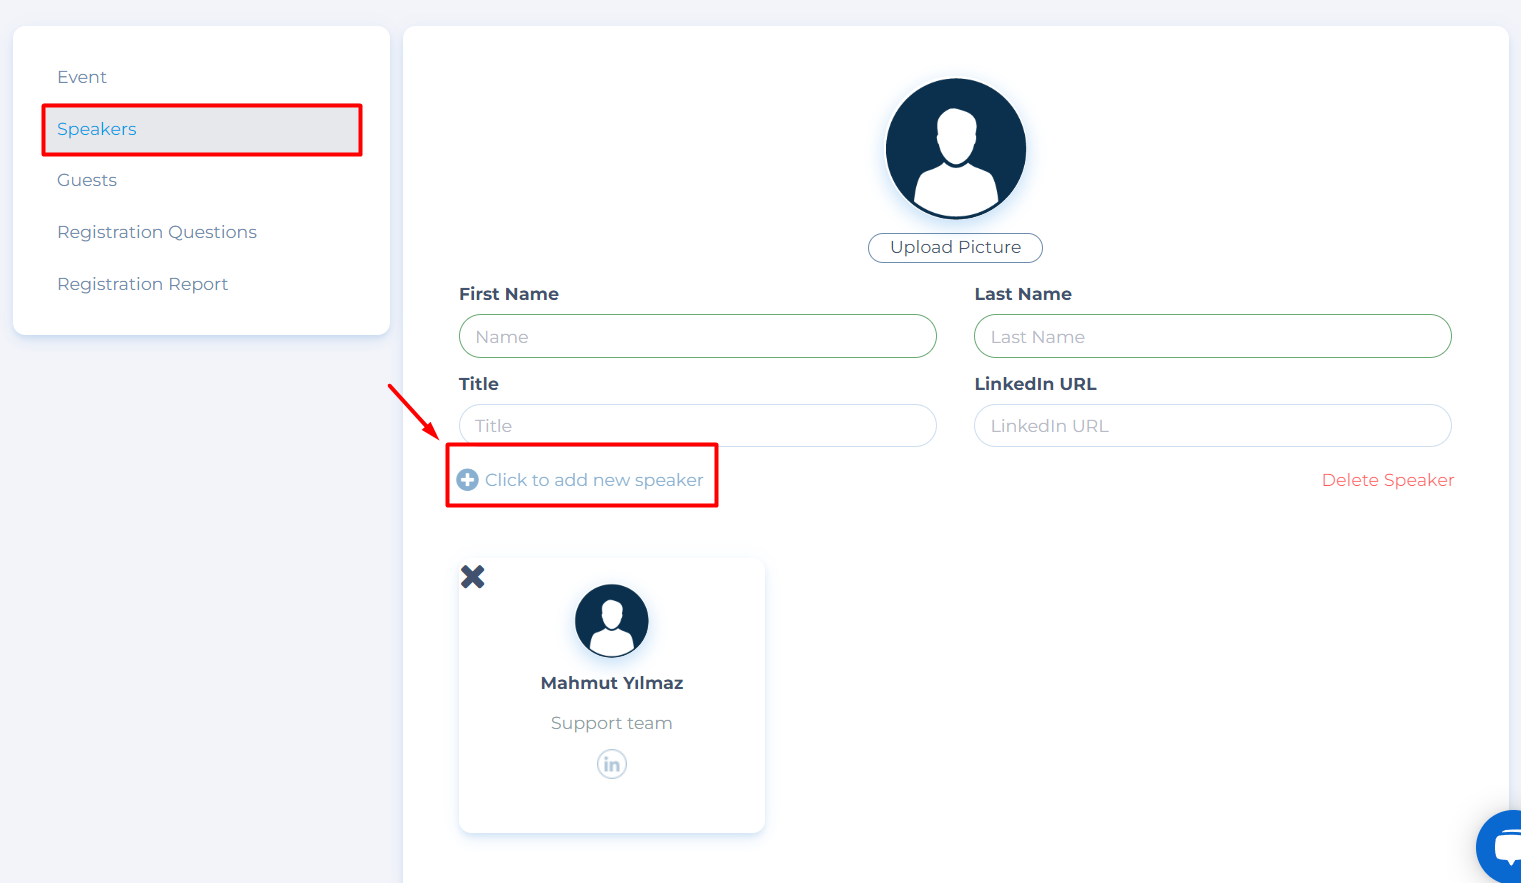
Speakers: From this area, you can add your event speakers with Name-Surname-Title-LinkedIn URL and pictures.
You can also add more than one speaker from "Click to add new speaker". Added speakers are displayed on the event page.
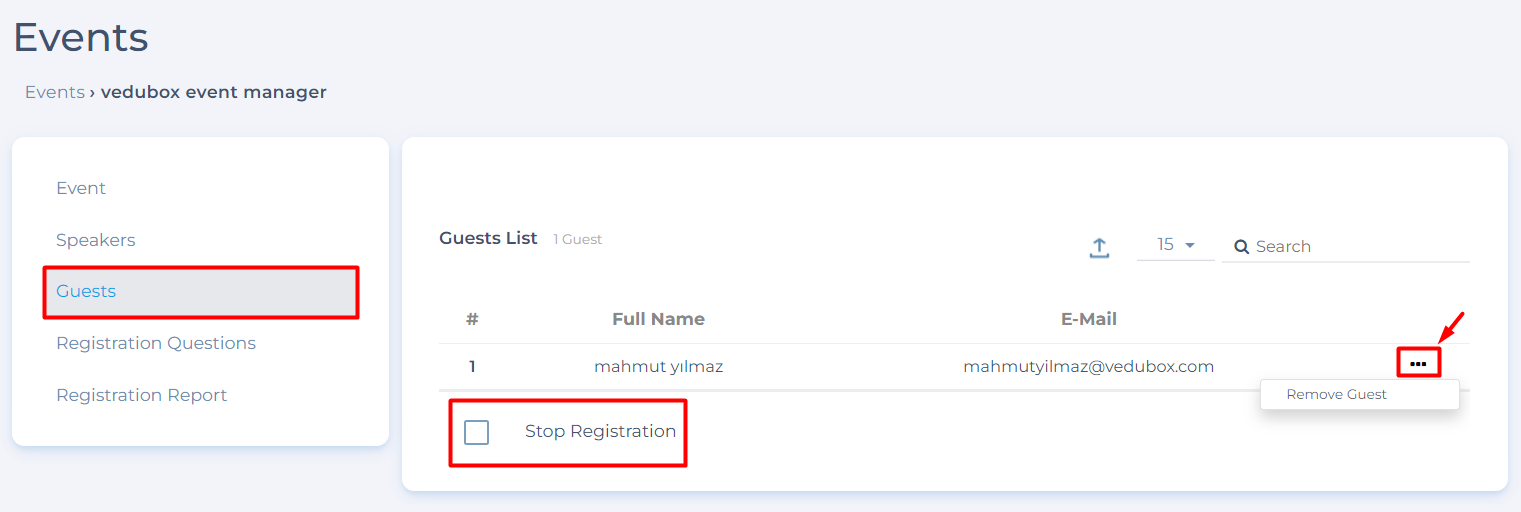
Guests: You can view those who registered for the event with their Name Surname-Email, delete the registration of a guest, or stop the registration at any time by ticking the "Stop Registration" checkbox. So the event will be displayed on the event page, but the registrations will be closed.
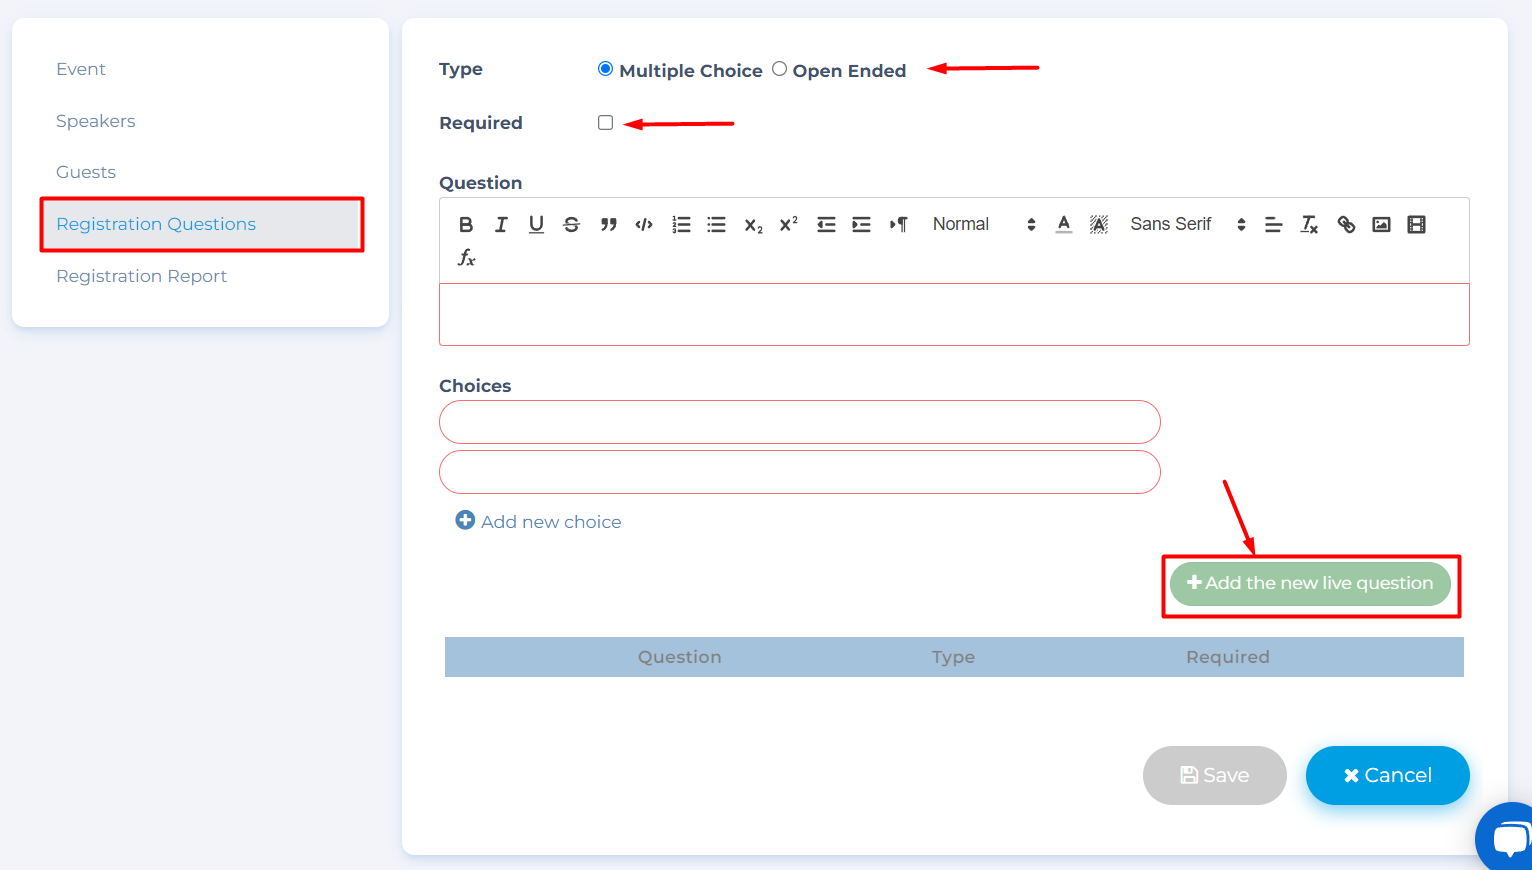
In the Registration questions section, whoever register to the event will be asked the question provided in this section.
- You can choose the question type as multiple choice or open ended.
- Enable Required option if all participants must answer this question,
Write your question and choices, then click "Add the new live question"
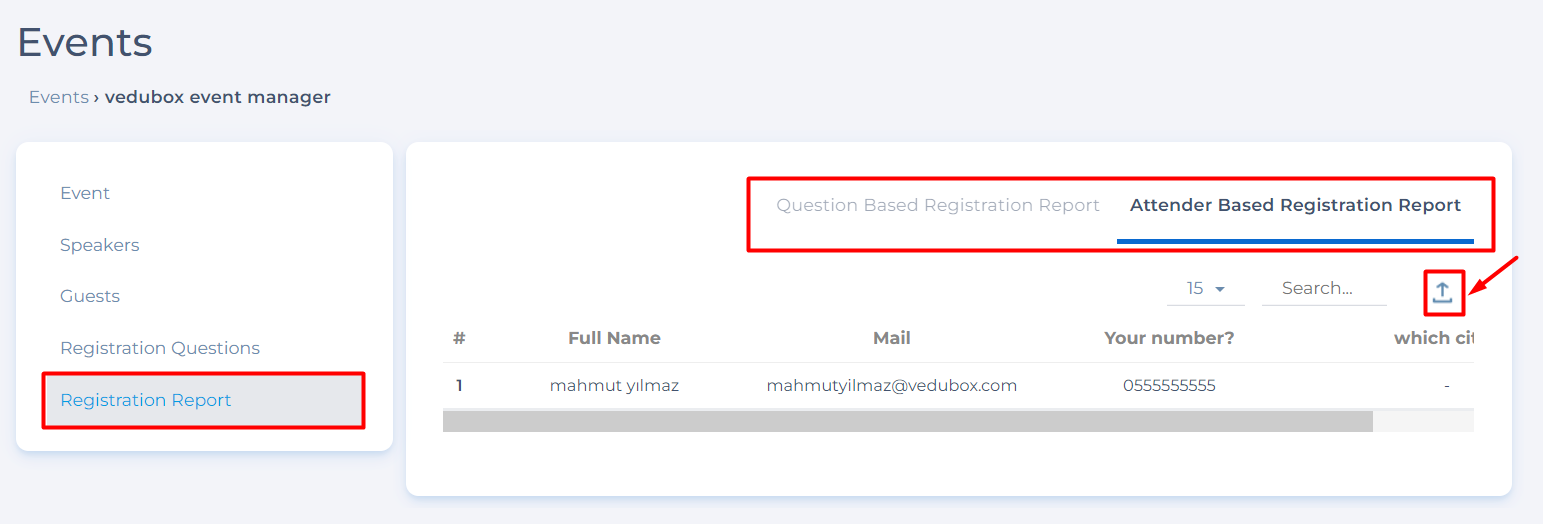
in the registration report section, you can view all attendees registered in the event, and You can also export the report with excel file.
You can also view question-based registration report.
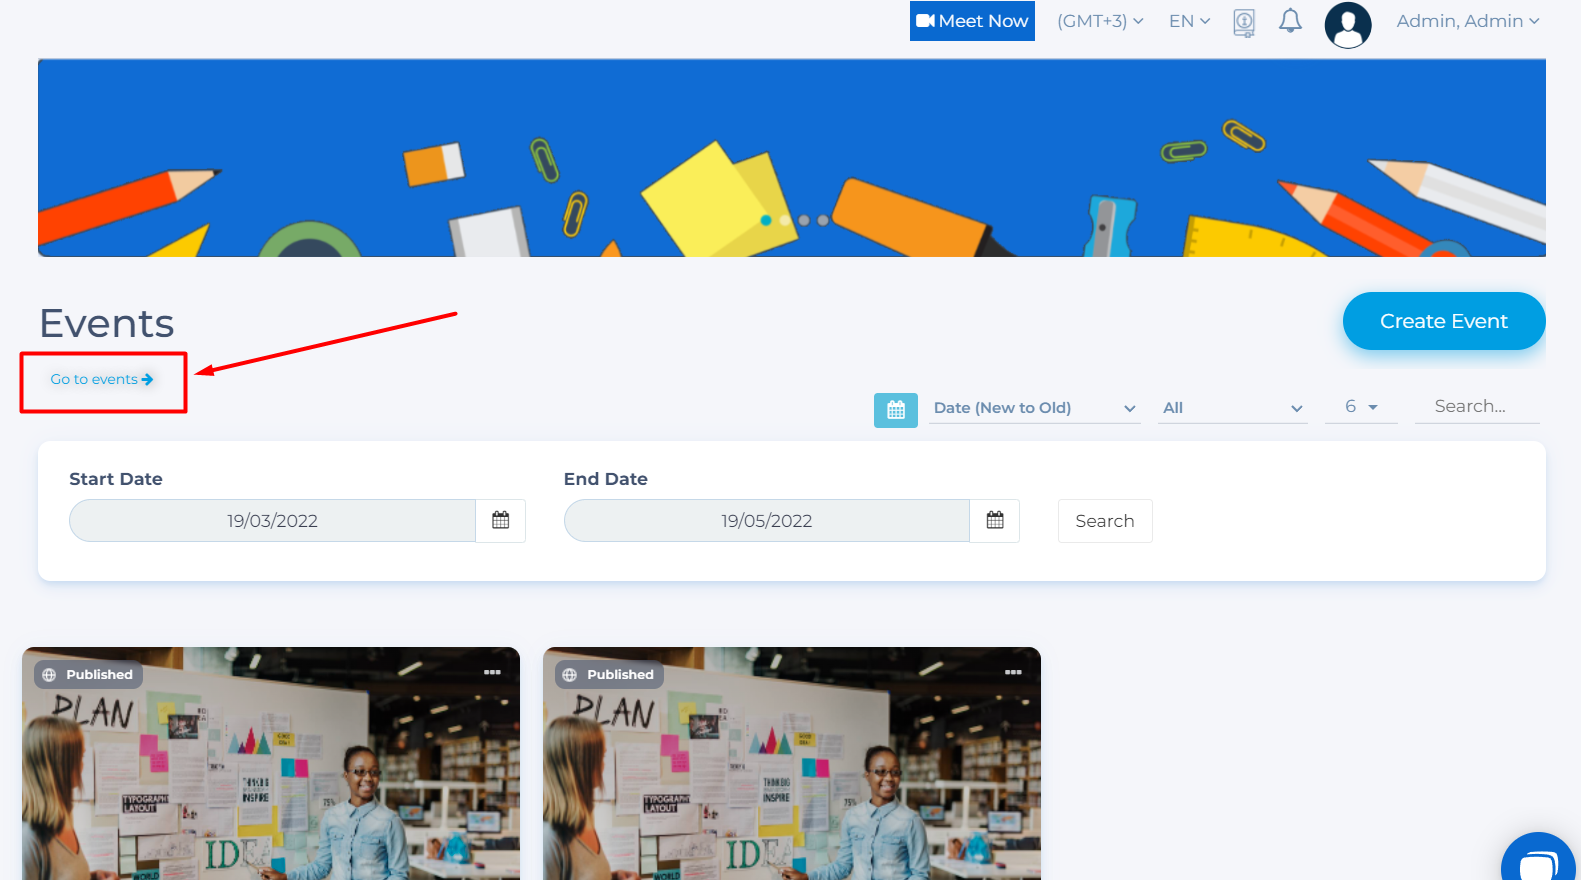
Finally, you can view the events you have created by clicking “Go to events”
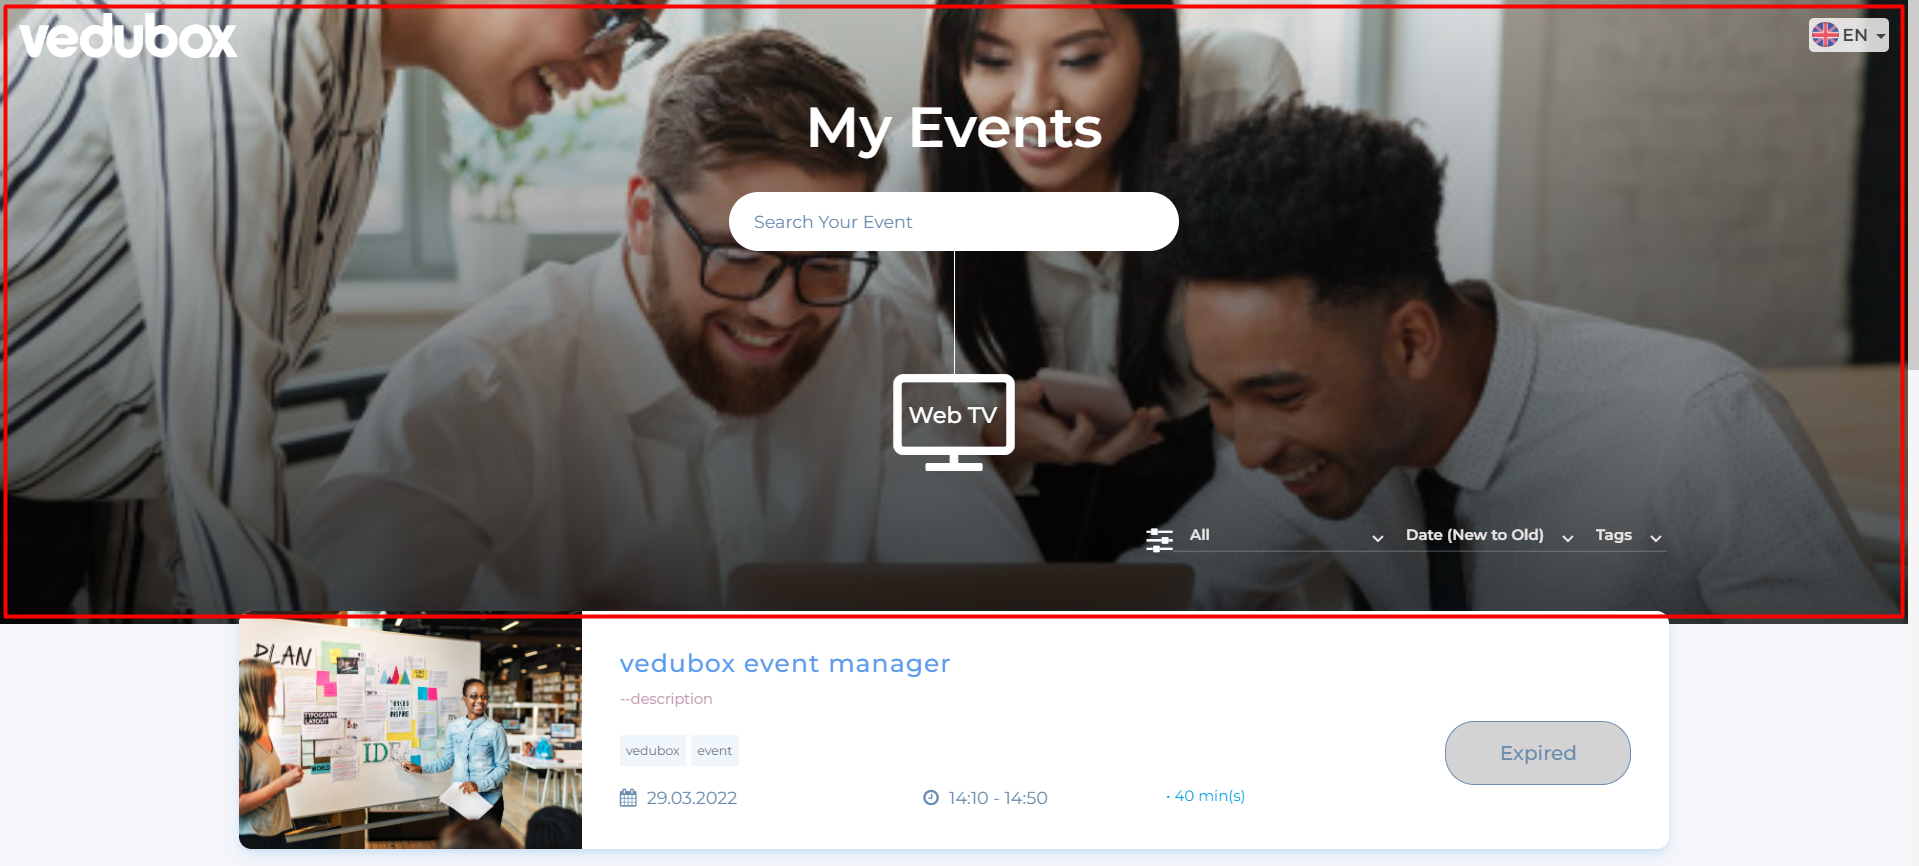
For endusers: systemurl/public/events
example link : https://learning.numesys.com.tr/public/events
In order to change your events background image page, follow the next steps:
- From Admin system click "Settings"
- Click "Event Manager" and upload an image as shown below.

Note: You can also change the display mode to "List view" or "Hourly view"
As a visitor on this page, the events that are live are displayed and those who want to register can access the registration page by clicking the Register button.
Registration Page;
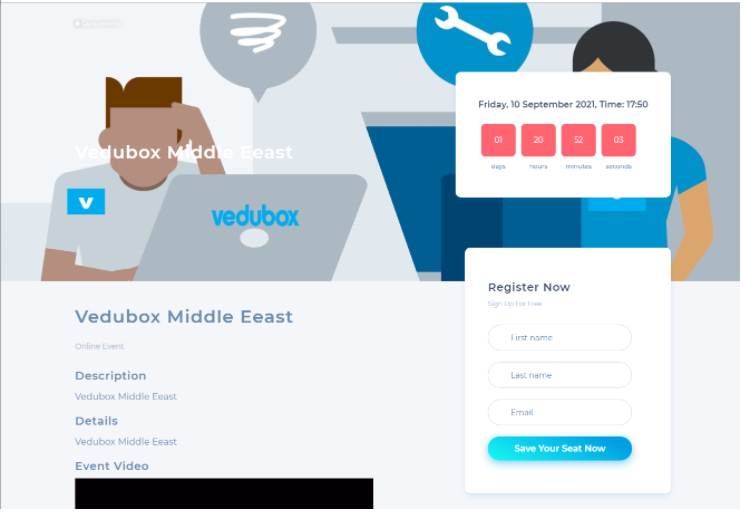
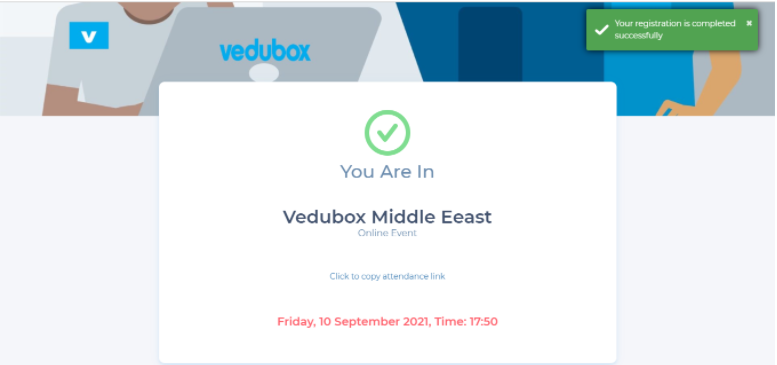
When registering for the event, the system automatically sends the link to the user for participation. They can automatically add the invitation link to their calendar, and participate directly in the event with the relevant invitation link at the time of the event day.
For more information about Zoom, you can contact our Sales or Support teams:
For detailed technical information:
Phone: +90 850 840 59 79
Email: support@vedubox.com
For pricing and plans:
Phone: +90 850 840 60 59
Email: sales@vedubox.com