Course Categories is used to
- Create a live lesson event, in order to easily select the lessons.
- Filter the created live lessons.
- List the courses by categories on the portal page.
Note: If there is no course category, a new course cannot be created, because category selection is mandatory when creating a course.
Steps:
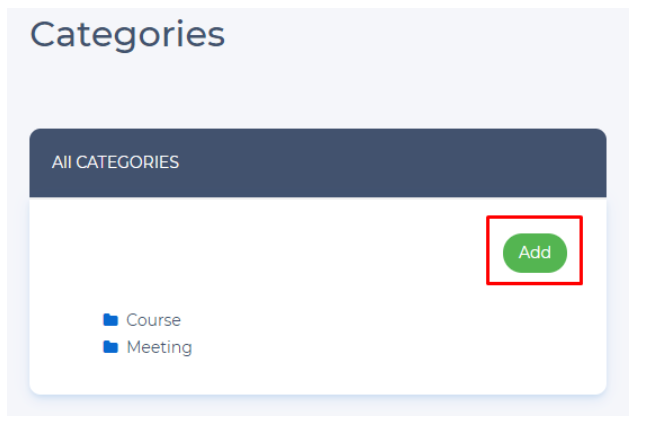
After logging in with your system administrator account, click on the Categories module.

You can add a new main category by clicking the Add button.
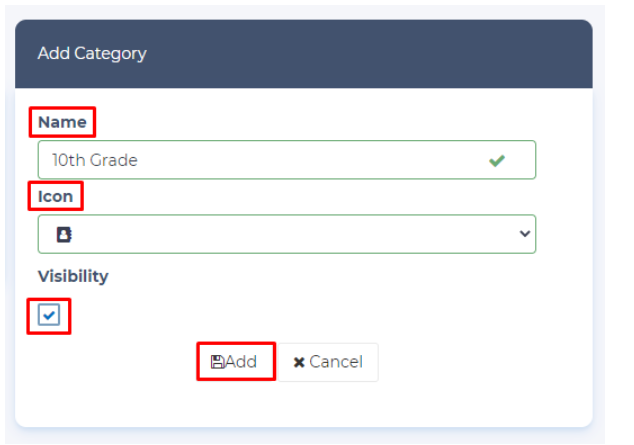
Type your category name. Icon and Visible options are for the use of categories in the Portal, they do not need to be used if there is no course package for sale.
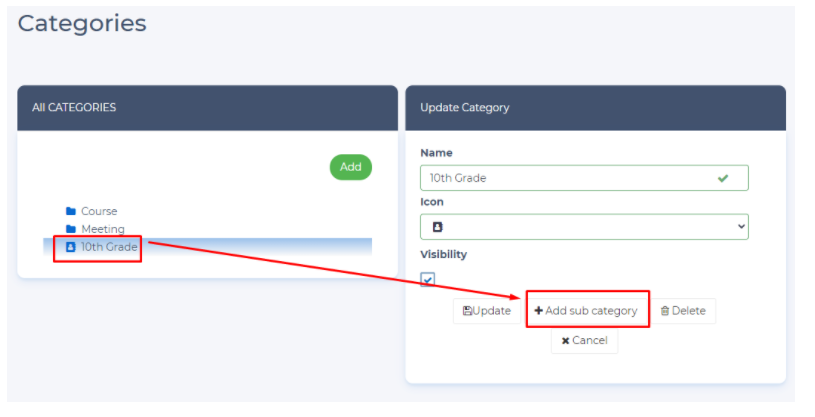
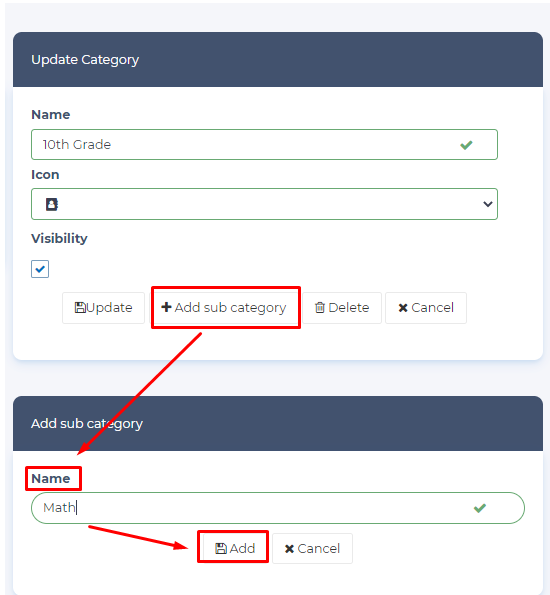
You can add subcategories to categories. By selecting a category first, then click the Add subcategory button.
Give your Sub-Category a name then click the Add button.
Tip: You do not need to create separate categories for each course. You only need to do an average grouping to make it easier for you to choose when creating a live lesson.
(For example, in order to easily find the course you want out of 50 courses, you can easily view the course you are looking for by first finding the 12th Grades category and then its Numerical subcategory.)
Note:
For the categories that should appear in the Portal, consider the following two conditions:
- With the icon option, you can select an icon for the category's Portal view.
- You can make the category visible in the Portal with the Let it appear option.