The following user roles and terms have the same functionality:
| Vedubox EDU | Vedubox Corporate |
| Parent | Mentor |
There are two ways to add parents to the system :
Creating Parent account manually
Steps:
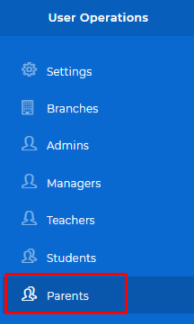
To create a parent, log in with the system administrator account. Click on the Parents module.
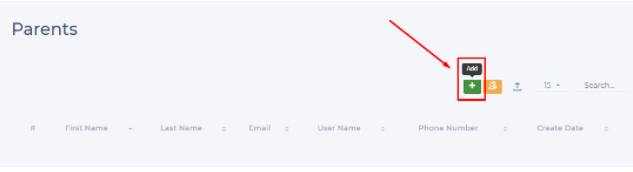
To add a Parent, Click "+" Add button
Fill in the required information as follows
- Fill the name and surname information.
- Press the add button to add the relevant child. Select the branch and the student. You can add more than one child.
- Enter the student's e-mail address.
- Note: When you provide a real e-mail address, live event notification, exam notification, and bulk e-mails will reach students.
- Enter username. (You can make the username the same as the e-mail address.)
- Enter password.

Warning: An e-mail address and a user name can only be used once in the system, regardless of account type.
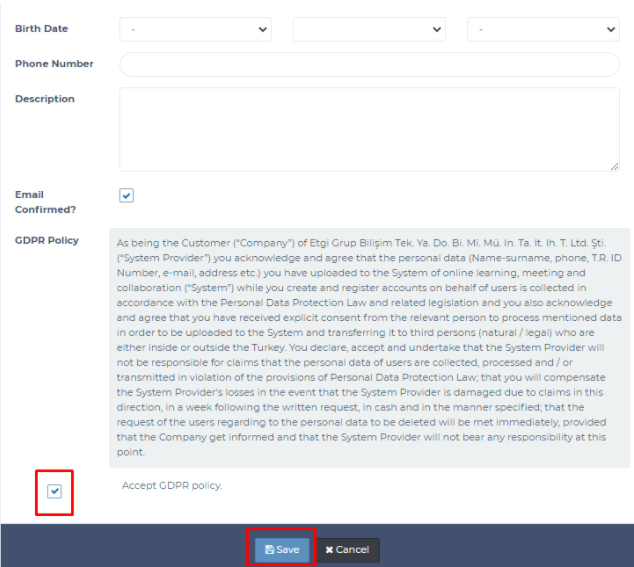
In the next step;
- You can add a date of birth. (Not required).
- You can add a GSM number. (Not required).
- You can add a description. (Not required).
- Email confirmation for the parent account.
Finally, After accepting the GDPR policy, you can complete your student registration by clicking the "Save" button.
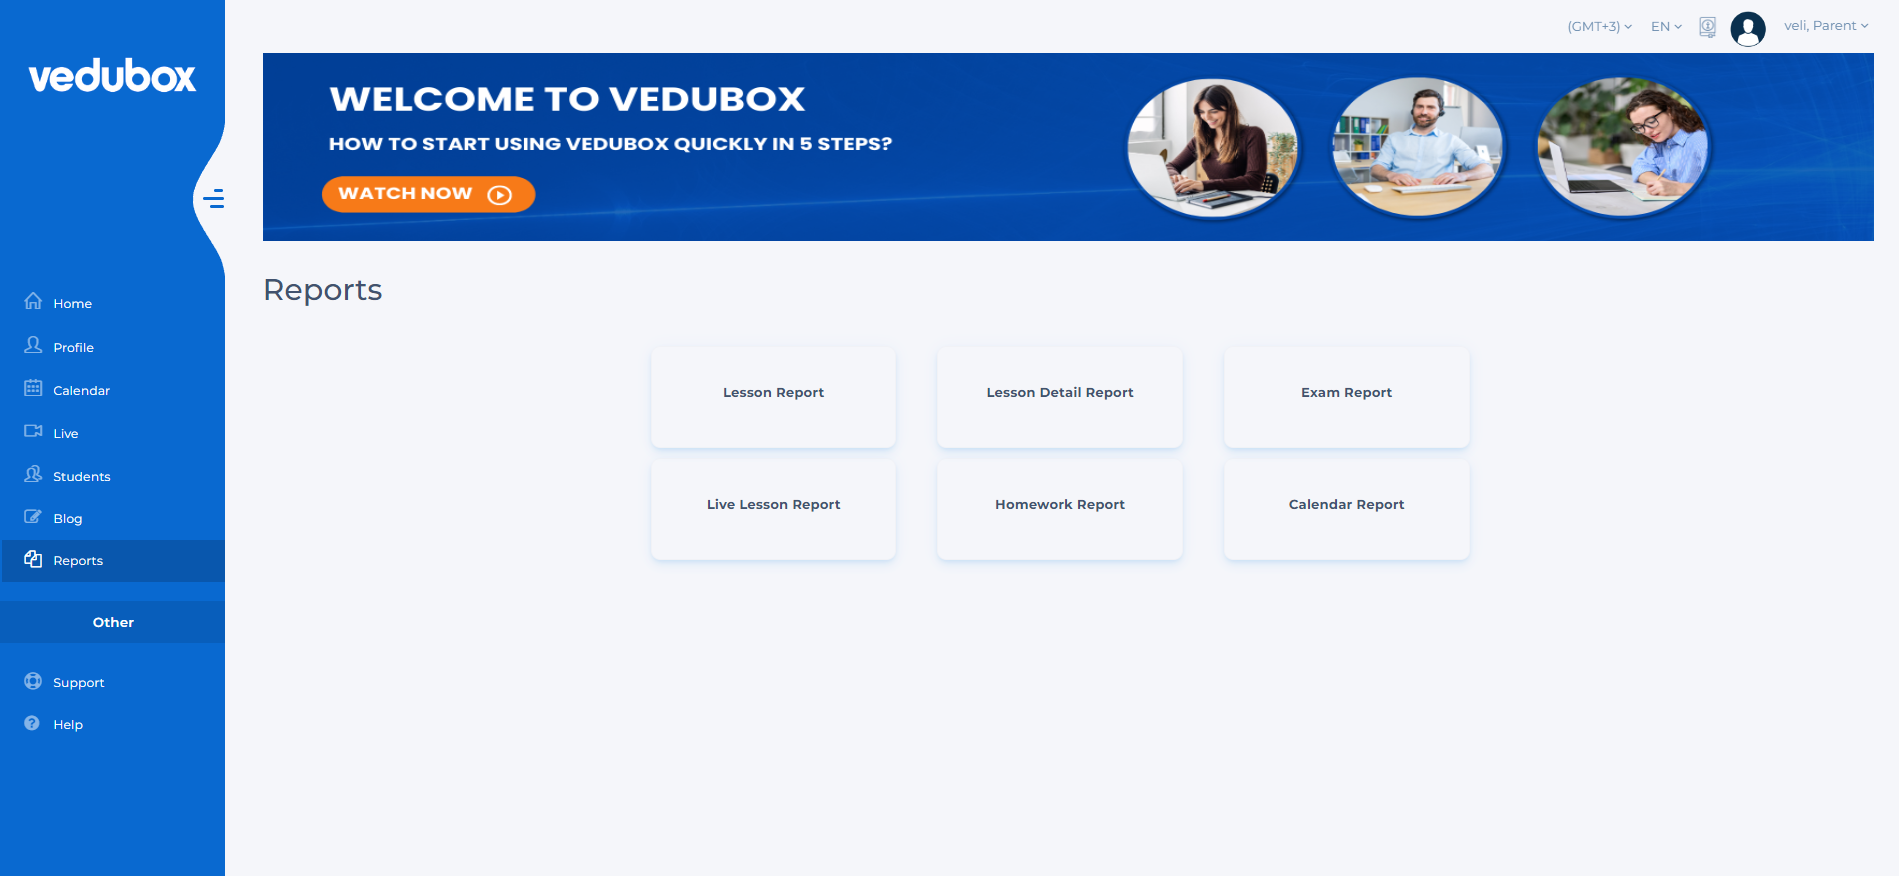
When you login to the system with a Parent/Mentor account, you can reach general Announcements, Polls, Planned Live Sessions, your Students and public Blog area.
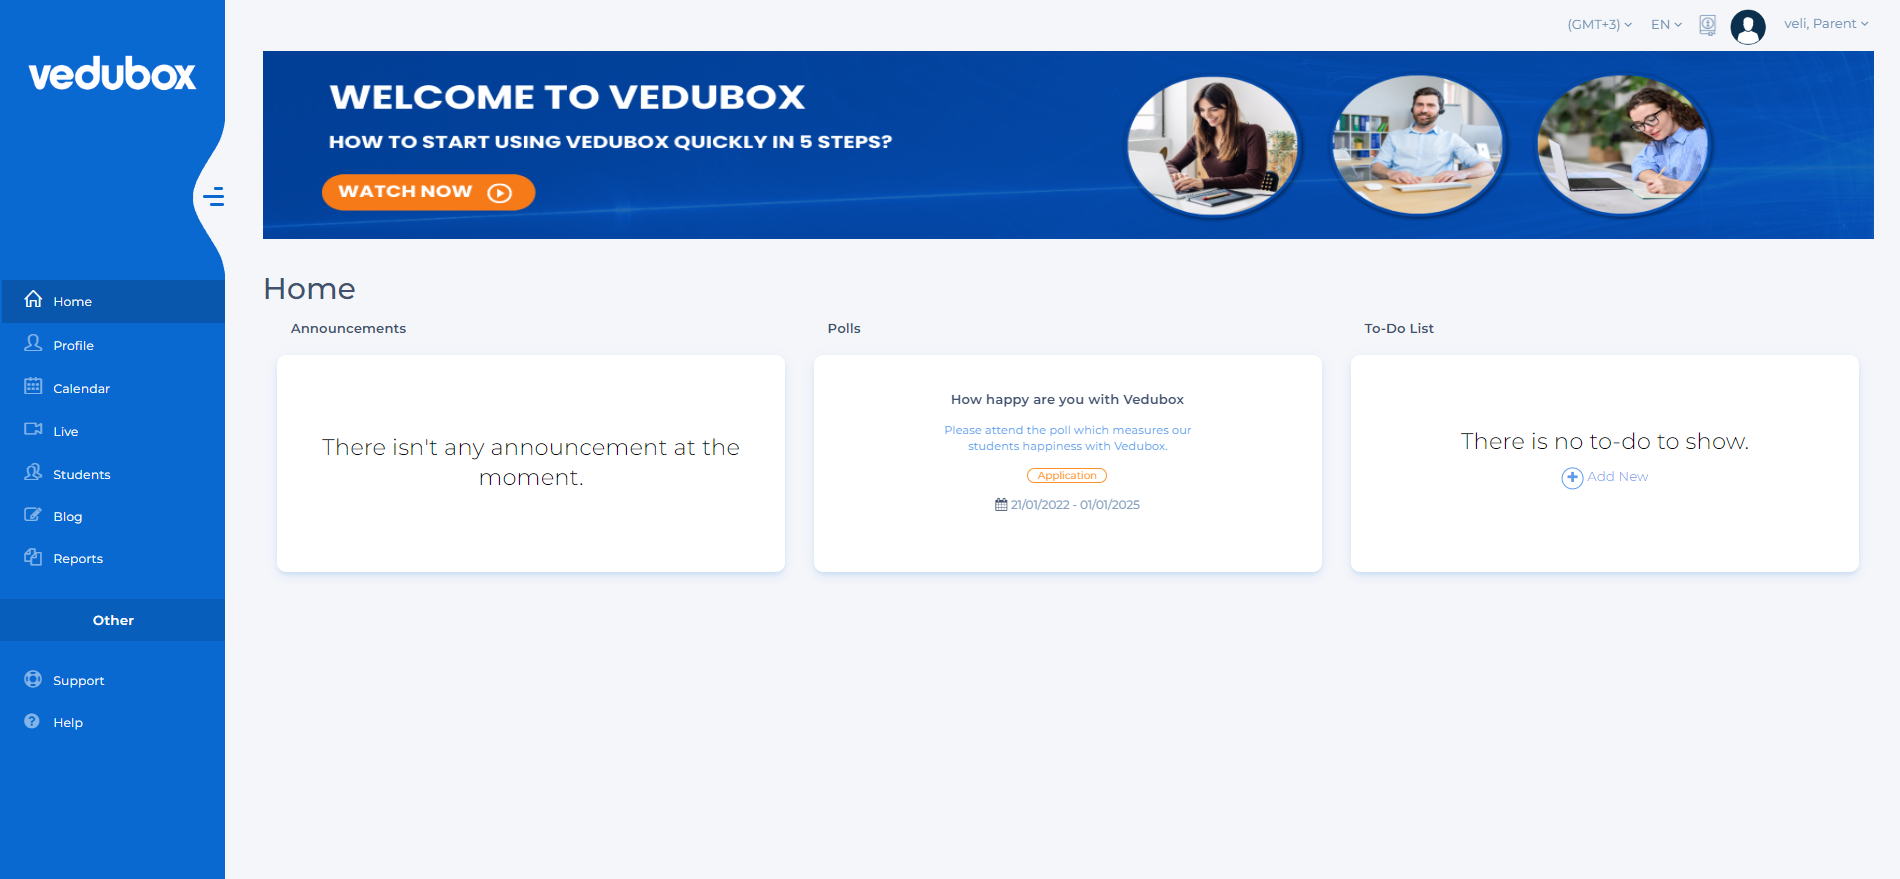
In Reports area Parents/Mentors can reach Lesson, Exam, Homework/Assignment, Live Sessions, and Calendar Reports.
Allow Parent Self Registration
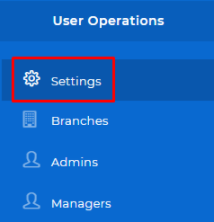
To allow parent self-registration, log in with the system administrator account. Click on Settings.
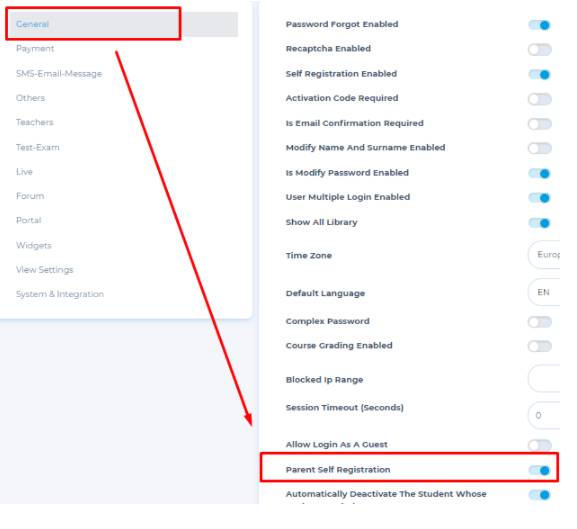
From the menu, choose General, scroll down and enable "Parent Self Registration".
Click the Save button to apply your changes
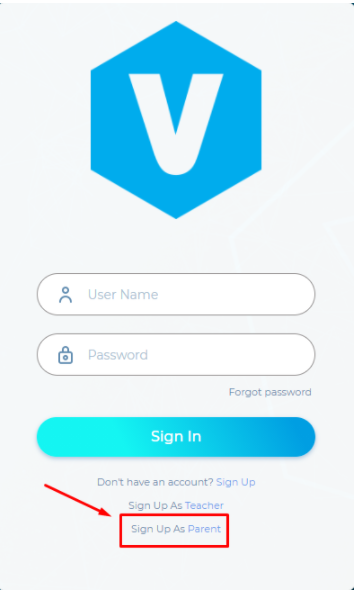
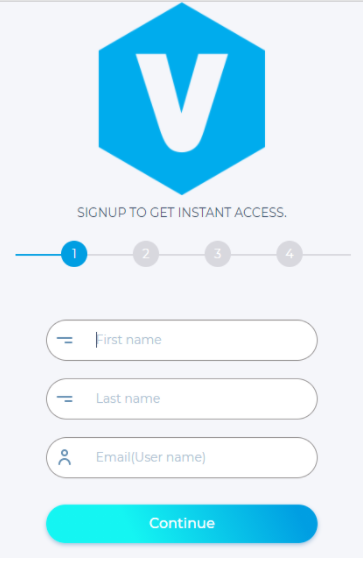
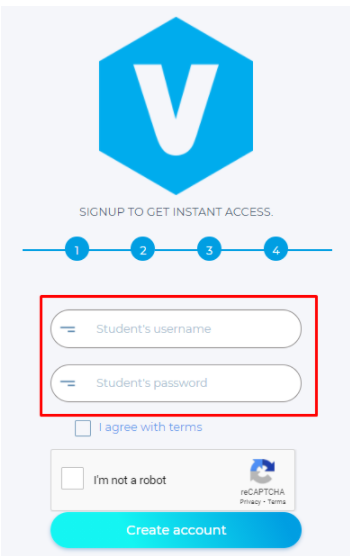
Now Parents can create their own accounts by Signing up from the login page as shown below
Fill in the required information in each step.
In the last step, you need to provide a registered Student username and password to be added as a child/student.
Finally, click "Create account".
Now you will be able to login into your account from the login page with the username and password you have registered.